Learn How To Draw Stewie Quickly & Easily
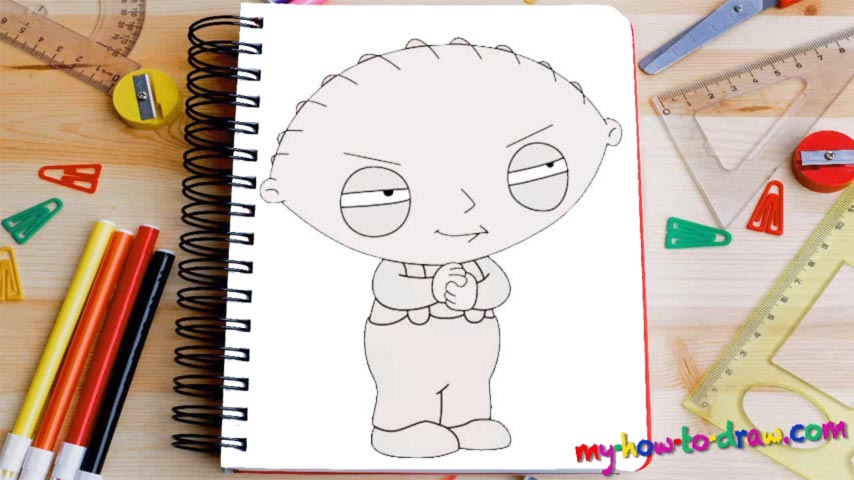
In this drawing, we’ve got three C-like curves that serve as the foundation for the whole thing (00 min 04 sec). The ones on top are the ears; the one below is for the left hand. By using them as your guidelines, create a perfectly-smooth oval shape that looks like a lemon (00 min 08 sec). This is our hero’s head and the most important part of this how to draw Stewie tutorial.
Two curvy lines at the bottom of it will help you form the hands (00 min 12 sec). As for the eyes, they are pretty huge and sit apart from each other (00 min 16 sec). You’ll need a pair of primitive circles, two horizontal lines, and two dots in the top right corner for the pupils (00 min 20 sec). The fingers might seem a bit tricky to you, but they’re actually not.
Use the video as some sort of a guide and bring this home. The feet are the next step in this how to draw Stewie tutorial (00 min 25 sec). As most of this drawing, they are very basic and come with no additional details. Same goes for the character’s pants (00 min 32 sec). The nose, the mouth, and the brows are nice and easy. That stylish haircut is the last thing to take care of (00 min 40 sec).
Before you learn how to draw Stewie, did you know?
Mr. Griffin is only 1-year-old, but he’s already got the brains of a genius and can take care of himself. As one of the main characters in Family Guy, a ridiculously-popular animated series on modern-day TV, he’s constantly “on the spot”. He’s the youngest kid in the family.
At first, Stewie was quite a violent child and couldn’t control his inner beast. Thankfully, over the years, he learned how to confront his demons and turned into a much calmer person. He even started to help others and made friends with a local doggy named Brian.