Learn How To Draw Spongebob Quickly & Easily
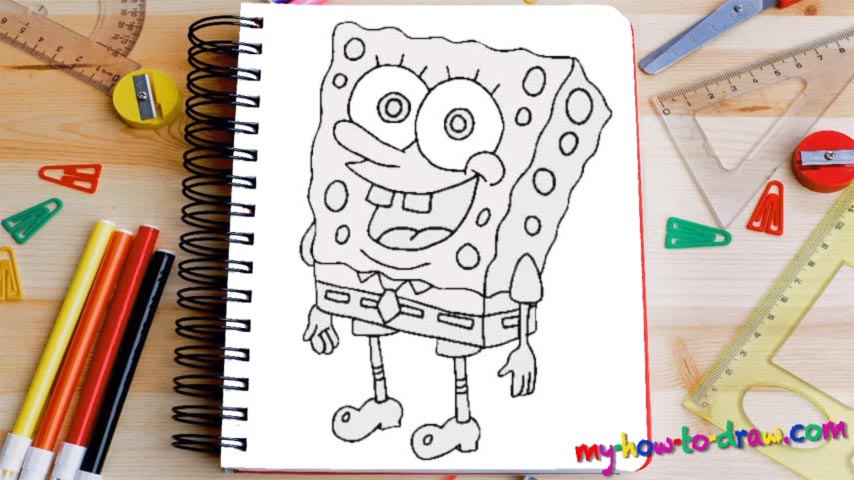
Before we begin, please take a good look at the final result. Make sure you get that angle right. Got it? Ok, let’s start this how to draw Spongebob tutorial with outlining the hero’s body (00 min 22 sec). As you can see, I’m using zigzag-like lines for this task. Once that rectangle is done, add the sleeve for the right hand (01 min 00 sec). The shirt comes next. Yes, it’s very narrow, but that’s exactly what makes Bob special (01 min 37 sec).
The right hand is quite simple, but still, follow the video closely and try to keep the proportions right (01 min 55 sec). If you’re happy with the result, go ahead and add that fancy tie (02 min 40 sec). Then, draw a straight horizontal line for the pants (03 min 03 sec). Those trademark rectangles all over the pants are the next step in this how to draw Spongebob tutorial (03 min 17 sec). After you’re done, create the left hand (03 min 50 sec).
It looks exactly like the other one; the only difference – we see it in reverse. The identical legs are the next step (04 min 20 sec). The shoes are nice and fancy; the legs are super-skinny. The facial features are the final part (06 min 05 sec). He’s got a long nose, two teeth on the upper jaw and huge eyes (three circles is all you’ll need for each). And don’t forget about those ovals/circles all over his body (08 min 17 sec).
Before you learn how to draw Spongebob, did you know?
We all love this guy, right? Come on, what’s there not to love?! He’s smart, witty, and has a good heart. His family and friends mean everything to Spongebob, and he’s always ready to come to their rescue. Together with Patrick, his good pal, he’s trying to make a difference.
There’s not much going on in the underwater world where he lives; well, at least that was true in the beginning. Now, the entire world is in danger because of numerous villains that want to take over Bob’s home. It’s time for the heroes to stand up against the bad guys!