Learn How to draw Palm Trees Quickly & Easily!
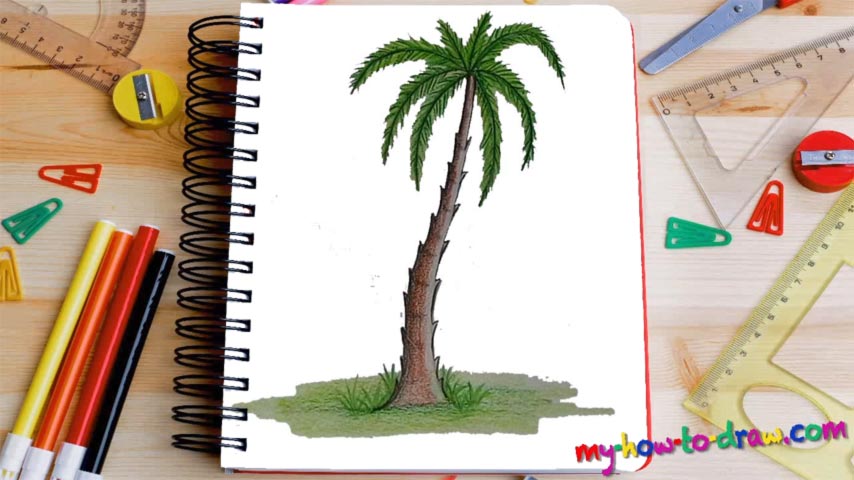
In this simple, yet informative video, you’ll learn a thing or two about palm trees and the right drawing techniques. It’s important to have a vision in your head before going ahead and putting that on a piece of paper. Ok, let’s learn how to draw palm trees. First of all, draw two straight lines in the middle (00 min 01 sec). They shouldn’t be parallel.
After you draw a rough sketch, move on to the real thing (00 min 08 sec). Basically, you should make the lines curvier as opposed to the light-stroke-lines we put in the beginning. This is a tree we’re dealing with and they’re usually never 100% straight. See what I did there in the video? Try to get your curves just right.
The next step of this how to draw palm trees tutorial are the branches (00 min 25 sec). Basically, just create 8 curves that go in different directions and imitate real-world branches. Nothing difficult there. Then, go back to the tree itself and work more on it (00 min 40 sec). We’re adding new details and coloring it to make our drawing look even more realistic.
If you’re happy with that, use a green pencil to paint the branches (01 min 05 sec). See those “spiky things” on both sides of the tree? Add them to give the drawing momentum (01 min 14 sec). And use a combination of two pencils (one green, and one with a lighter tone) to draw the leaves (01 min 41 sec).
Looks pretty awesome, doesn’t it? That could be it for this how to draw palm trees tutorial, but we’ve got one final stage to complete (02 min 30 sec). Use light green for the ground and darker tones for the grass.
Before you learn how to draw Palm Trees, did you know?
Nothing says beaches, sunlight and fun like the palm trees do. If you’re all about that good life and appreciate a hot, sunny climate, go ahead and study this tutorial from start to finish. Perfect your drawing until you’re 100% happy with it!