Learn How to draw Tweety Bird Quickly & Easily!
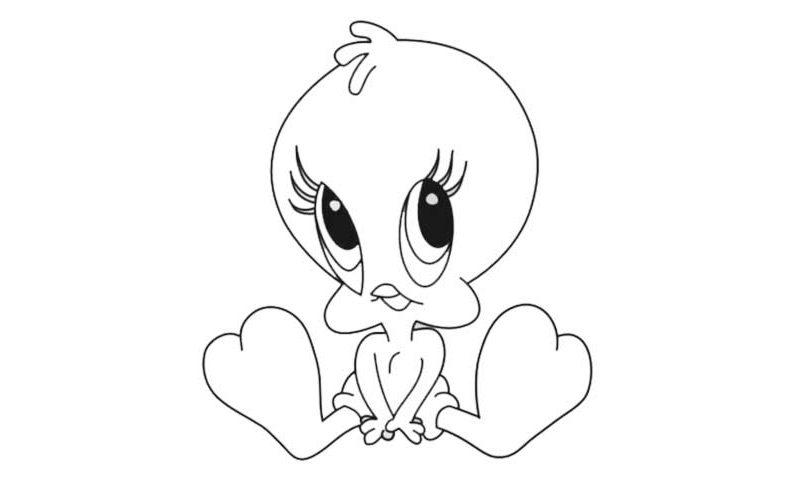
Without a doubt, the eyes are the most in-your-face elements of this composition, and that is exactly why we’ll get to them first (00 min 28 sec). Start this how to draw Tweety Bird tutorial by creating two oval lines right in the middle of the paper. And, make sure the right eye is wider than the left one. Next, add that cute beak (01 min 06 sec).
Use two identical curves right below the eyes to mark the cheeks. Once that’s done, jump to the very top and draw the hair (01 min 21 sec). You’ll need a pair of extra-smooth lines to complete the head. Watch the video closely and try to keep the proportions right. Now, even though this is a boy, he’s got lush eyelashes.
If you’re happy with those, move on to the next part of this how to draw Tweety Bird tutorial – the body (02 min 05 sec). The body itself is super-tiny; so are the slim hands. However, the feet are pretty huge (02 min 39 sec). They are identical and won’t be a hard task to complete. But, again, you should pay attention to the proportions. Even though they are “wrong” in my example, that serves a great purpose: our character looks “cartoony”.
Before you learn how to draw Tweety Bird, did you know?
Warner Bros. created more iconic cartoon characters than we can count, and Tweety Bird is, without a doubt, one of them. This lovely yellow canary made an appearance in 47 cartoons and is one of the most recognizable on-screen heroes among kids.
Now, despite the popular belief, Tweety is a male and that is confirmed on several occasions. Brisk, motivated, and full of life, he wants to explore the world around him and finds new friends and new adventures along the way while trying to escape his enemies.