Learn How To Draw Piglet Quickly & Easily
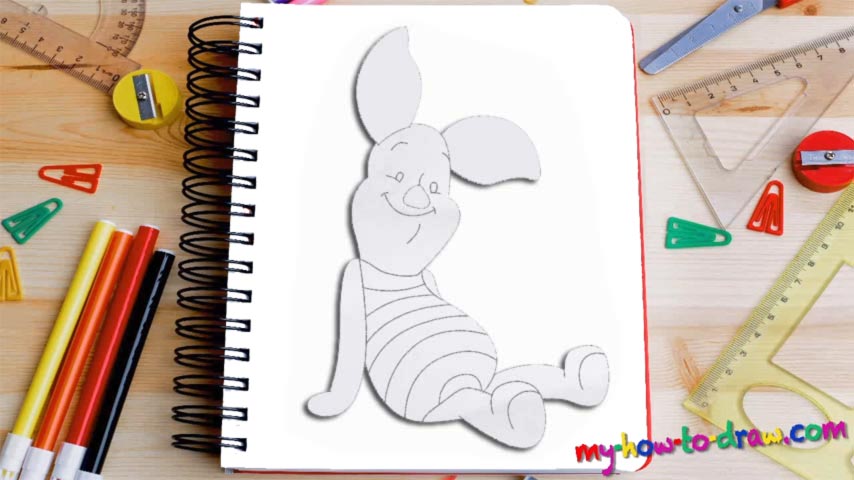
This guy’s head is pretty huge: it’s almost as big as the body. Plus, it’s quite long and looks a bit like a vase (00 min 27 sec). Both sides are almost the same but have some tiny differences because of the angle. Same goes for the ears, the next step in this how to draw Piglet tutorial (00 min 35 sec). They look a lot like the leaves you see on the ground during autumn.
Everything feels good? Ok, then let’s move on to the face, shall we? The big, potato-like nose comes first (00 min 45 sec). The eyes are super-tiny and the brows almost touch the ears (they’re high up on the forehead). The mouth is a piece of cake. All of the facial features are located in the upper half of the head. The left hand, the one he’s leaning on, is the next step in this how to draw Piglet tutorial (01 min 01 sec).
Once it’s in place, use an S-like curve to shape the body (01 min 08 sec). The identical feet should follow. Piglet has a t-shirt on with stripes all over it (01 min 27 sec). Add those before taking care of the right hand (which is practically out of our sight) (01 min 40 sec). The final result looks quite alright, doesn’t it? The proportions and the angles are the most important features of this drawing.
Before you learn how to draw Piglet, did you know?
Do you love the good-old Winnie the Pooh stories as much as we do? If the answer is yes, then you definitely remember Piglet, his good friend and “partner in crime”. Even though he’s not the biggest animal in the kingdom, Piglet always tries to be strong and fearless, just like Winnie.
This guy doesn’t have any enemies and every single person out there likes him. At the same time, he’s got a timid personality that prevents him from proving his worth. Piglet can read and write, which can’t be said about the majority of the animals/toys out there.