Learn How To Draw Family Guy Quickly & Easily
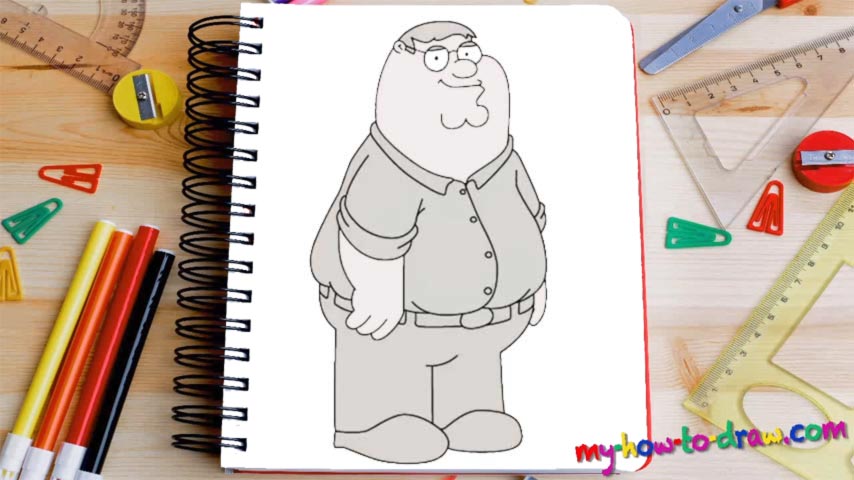
In this video, we’ll try to put the main facial features in first and only then work on the details (00 min 04 sec). You’ve got the nose, the tiny eyes, and the double chin. Once those parts are in, we can go ahead and get to the meat and potatoes of this how to draw Family Guy tutorial (00 min 12 sec). The hair on top of his head and the neck of the shirt come next.
Now you should add all those guidelines you’ve just made and finish the face. It’s pretty big and long, which accentuates the fact that our guy is a chubby hero. Plus, go down to the shirt and finish the sleeves (00 min 16 sec). The rest is relatively easy. Use three similar curves for the upper part of the body and finish the left hand by working on the fingers – three in total (00 min 22 sec). Take your time.
And, be careful at this stage of the how to draw Family Guy tutorial: it’s important to keep the proportions right. If everything’s Oki-Doki, get to the feet (00 min 30 sec). He’s got a pair of classic shoes on and four buttons on his shirt (00 min 40 sec). That’s actually it for this video. The right hand is almost completely out of the picture. But it’s still there. Finally, add the belt and be gone!
Before you learn how to draw Family Guy, did you know?
Peter, the “Family Guy”, is a regular American fella. He first appeared on the small screens back in 1998 and is still one of the most fan-favored cartoon characters. Mr. MacFarlane, the man who gave Peter his voice, came up with his concept and design all by himself.
He’s married and has three kids – two boys and one girl. Plus, the family has a dog named Brian that Mr. Griffin is very close with. Now, even though he’s a man wearing a blue collar at the office every day, Pete had more than enough exciting experiences in his life.