Learn How To Draw Batman Quickly & Easily!
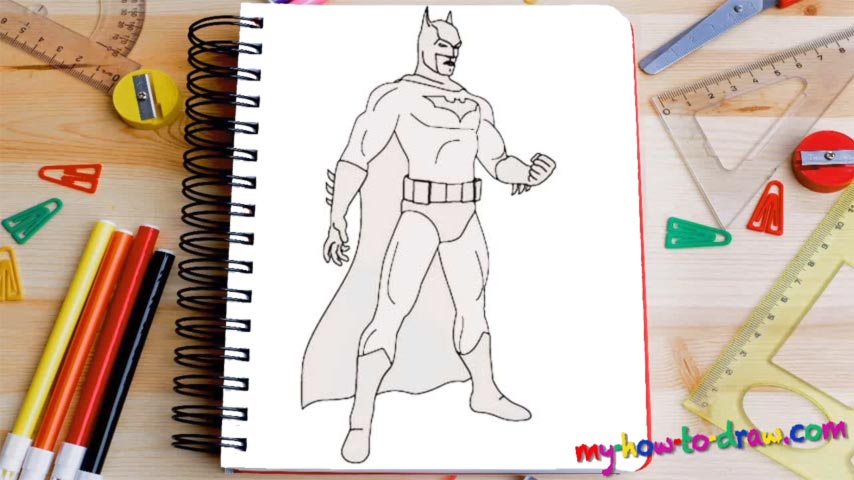
You might think that this is a complicated drawing, but it’s actually not. If you follow my recommendations in the how to draw Batman tutorial, you’ll be able to master it in no time! Ok, let’s begin with the hero’s face (00 min 05 sec). This is that classic image of a mask with two “horns” and an open spot for the nose and the mouth. The most important thing here is to keep the proportions right.
Even though Bats is a great vigilante, he’s not a huge man – just someone in a great physical shape. Make sure you picture that in this drawing. The body starts with the neck and the left hand (00 min 14 sec). By using simple curves, define the major muscles on both his hands that accentuate his masculine side. That belt – his trademark “clothing feature” – comes next (00 min 23 sec).
If you’re a fan of this hero, then you know that he’s got three spikes on each hand (00 min 30 sec).The next step of this how to draw Batman tutorial – the boots – are long, fancy, and identical (00 min 40 sec). That’s also true for the legs. The cape and the Batman logo on his chest are the final things to take care of (00 min 45 sec). You’ll need two long lines for the cape.
Before you learn how to draw Batman, did you know?
This guy is the face of the DC Universe, along with Clark Kent, and one of the most favorite superheroes on planet Earth. He lost his family as a young boy and had to rely on his own self and his butler to grow into the man that can protect his city from the criminals.
Batman doesn’t have any superpowers and is just another regular human being. At the same time, thanks to his brilliant mind, numerous combat trials, and unlimited resources, the vigilante has the best tech in the world that allows him to stay one step ahead.