Learn How To Draw An Eagle Quickly & Easily!
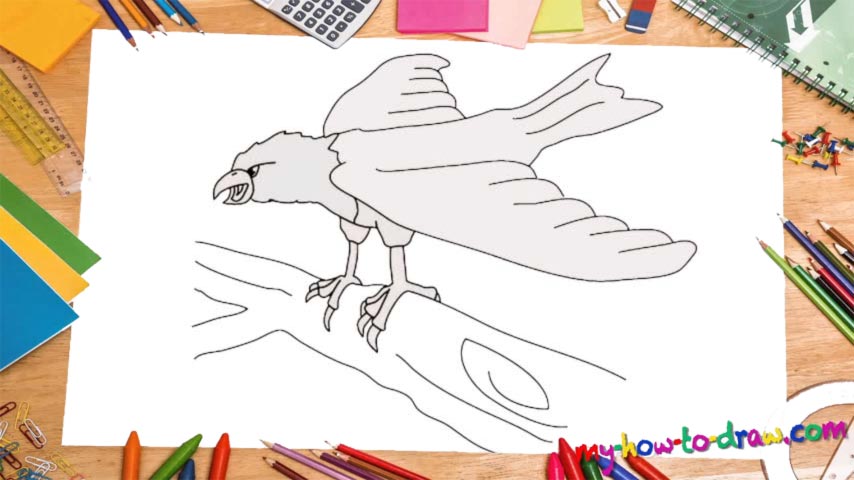
Let’s start this complex drawing with the beak, or, rather, its upper part (00 min 05 sec). The lower half comes next. Looks good? Great, let’s move on to the next stage of this how to draw an Eagle tutorial – the head (00 min 20 sec). Add a zigzag-like line that starts at the top of the beak. Then, use the video as a guide, and create the super-long line for the body and the tail (00 min 25 sec).
The right wing – another long line with a curve – follows. Connect it to the body with a series of identical lines that represent the feathers (00 min 35 sec). The left wing is pretty much the same but it looks significantly smaller because of the angle of this drawing. If you’re happy with everything, go ahead and draw the “foundations” for the legs and connect them to the beak to complete the head (00 min 52 sec).
The feet with those extra sharp talons are the next step in this how to draw An Eagle tutorial (01 min 10 sec). Pay attention to my actions in the video and try to get the proportions right. The bird sits on top of a tree – get to it next (01 min 54 sec). The eye is the final step in this guide, dear ladies, and gentlemen (02 min 02 sec).
Before you learn how to draw An Eagle, did you know?
We use this name to describe several big birds. Overall, there are sixty species of eagles on planet Earth, most of which live in Africa and Eurasia. Big, strong, and fast, eagles are scary predators that attack their victims without a sign of remorse.
Their beaks and talons are lethal and can rip through even the toughest bones and body protection. Plus, they have the best sight in the world and can track their prey from miles away. With an arsenal like that, no wonder eagles are considered to be a huge threat!