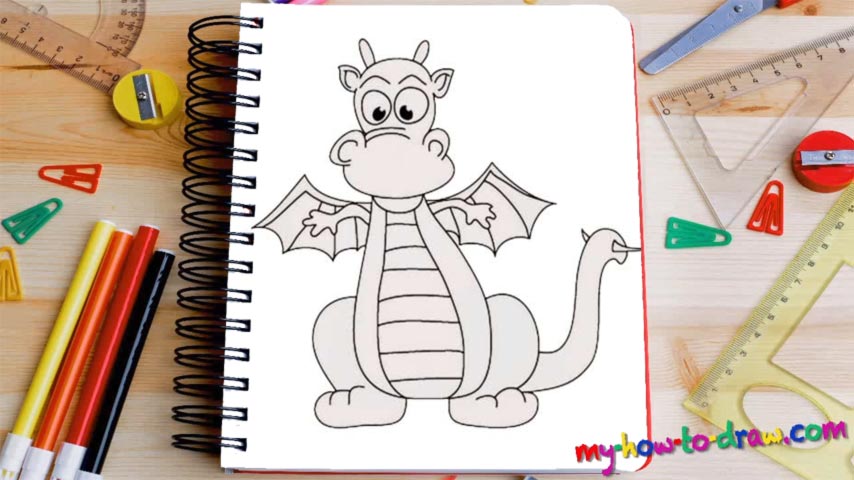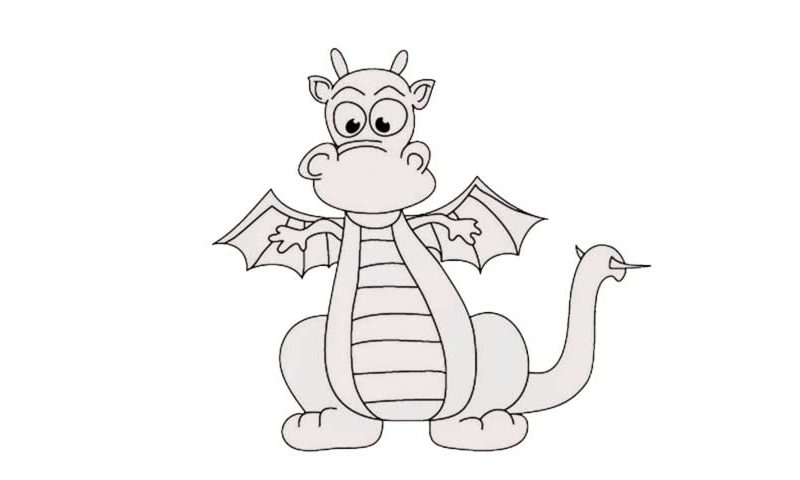
Learn How to draw Dragons Quickly & Easily!
We’ve got a rather simplified drawing of a centuries-old beast here that looks like it ran away from a famous cartoon series. We begin this how to draw Dragons tutorial with two circles for the eyes and two half-ovals on the sides for the lower part of the jaw (00 min 05 sec). Once those are in place, create a much bigger oval shape at the bottom to cover the lower part of the head. And, add those tiny ears on top of the eyes (00 min 08 sec).
Now it’s time to complete the head with a curvy line at the top (connecting the ears to each other) and another one for the mouth/tongue (00 min 14 sec). If everything looks good, move on to the body (00 min 16 sec). But don’t forget about those spikes/horns on top of the beast’s head. Yes, we still have a lot of work on the face, line the inner side of the ears, the eyebrows, and the eyes (00 min 21 sec).
The next stage in this how to draw Dragons tutorial are the identical hands and legs. The wings should be placed right behind the hands (00 min 30 sec). Use two C-like shapes to complete the legs and move on to the final part – the tail. It looks like an elephant’s trunk, doesn’t it? Put the “stripes” all over the wings and the body (00 min 40 sec). That’s actually it!
Before you learn how to draw Dragons, did you know?
These mythological creatures are very popular in Asian and European folklore and are featured in numerous books, movies, TV series, and, of course, video games. Obviously, dragons are not real, but they have a prominent place in the modern-day world (take Games of Thrones, for example).
Note: while the dragons in the European culture come with four legs, a pair of wings, and are just big, scary animals, the Asians picture them with four wings (and, of course, four legs). Plus, over there, these beasts are smarter than any other living thing on the planet.